I love the notion of building a tool. I’ve since used this machine for many projects, and having such a flexible system boosts my creativity. I’d like to think that this monstrosity is worth all of the dust and din it imparts!
“Completed” machine:
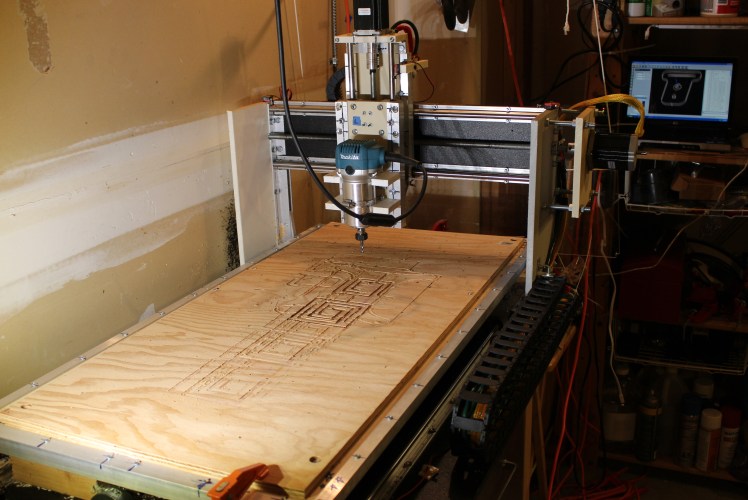
I began the project in the summer of 2014. With no “precision” tools except for a hacksaw and drill press, I created as many jigs and drilling guides as possible in order to keep surfaces parallel. Indeed, I soon realized that it would have much easier to build a CNC router once I already had one. Except for a couple larger components, the entire structure is built from aluminum angle extrusion and scrap Starboard. It runs on 12mm linear supported round rail — I bought this cheaply online and had to return it three times before getting a straight piece! In order to reduce backlash, I asked my friend to 3D print dual nut and spring assemblies to fit nuts onto threaded rod lead screws. By the end of summer 2014, I had finished most of the core mechanical components, however some parts were less than satisfactory. In the fall I designed a specialized manual operation (jogging) controller PCB (printed circuit board) for testing and homing.
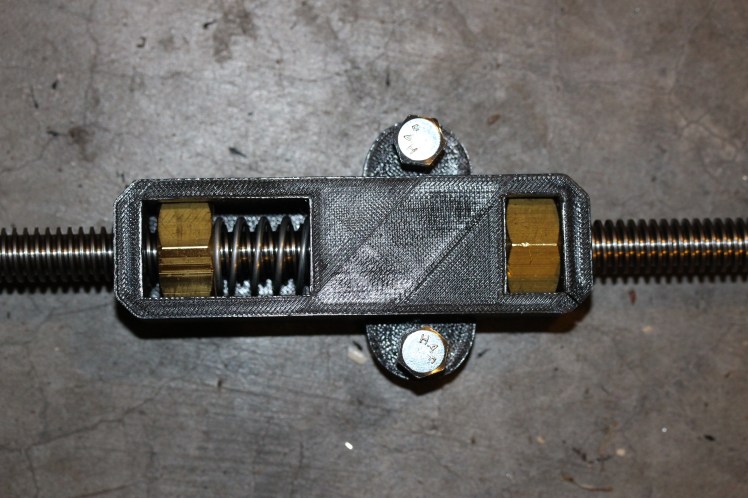
X-axis 3D printed anti-backlash nut assembly:
In the summer of 2015, I decided to made some major improvements. Instead of running a 50ft long USB cable to another room, my friend graciously gave me the 2005 Windows XP laptop that currently runs the machine. I also added cable carriers and improved wire-management. The hardware store leadscrews driving the machine were highly inefficient, so I replaced the X-axis screw with ACME threaded rod. The Y-axis screw still desperately needs replacing, but it is unfortunately quite inaccessible, so I did not get around to it. Originally, to save cost, I used unsupported rail for the Z-axis; this was not worth the savings, as it reduces rigidity substantially; unfortunately again I did not get to replacing this component. Despite these pitfalls, I was able to machine many successful projects in plastic, rubber, and wood.
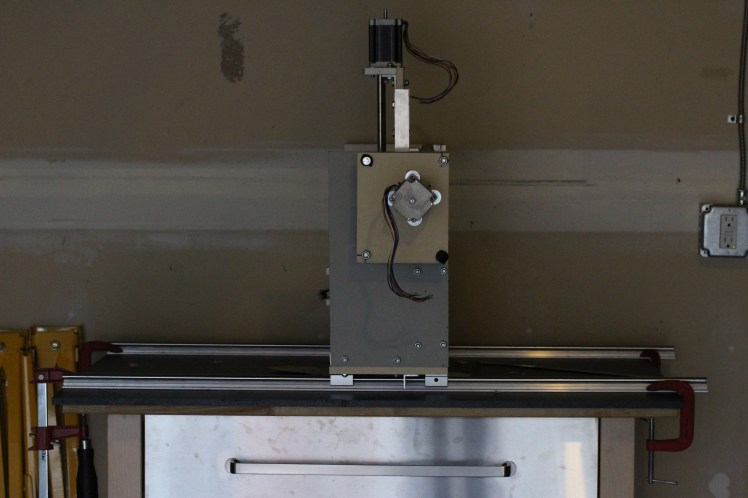
“Completed” machine, side view:
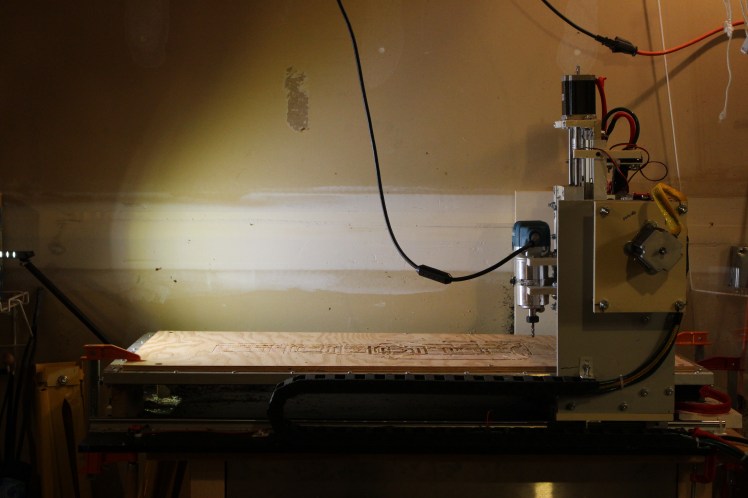
I have continued using the machine frequently, and have mostly accepted its limitations. I figure that it’s not quite worth the time and money to bring it to its full potential, as next year in college I will not get to use it as much, and after college I could build a new machine on a higher budget.
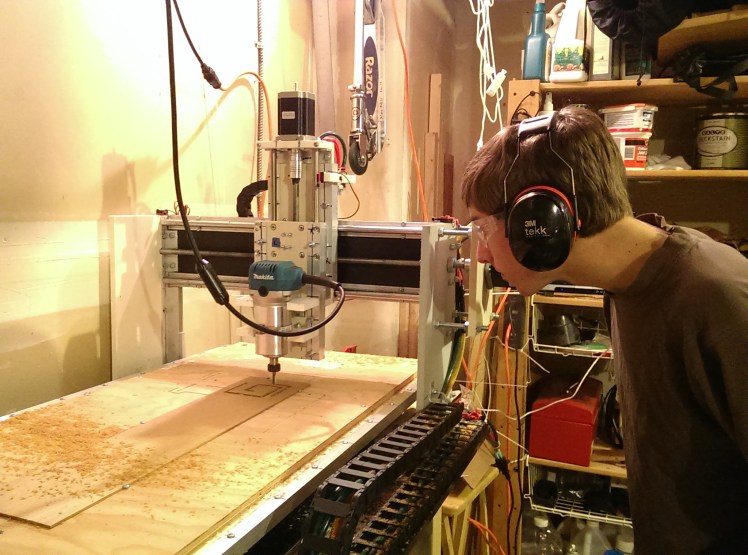
Watching nervously:
In terms of workflow, I design parts in Solidworks CAD and create CAM tool paths in HSMXpress. The machine runs on the Planet CNC GCode interpreter. This does a everything I need it to, and can plug into a standard USB 2.0 port, unlike Mach 3 which needs a serial connection.
More photos of construction:
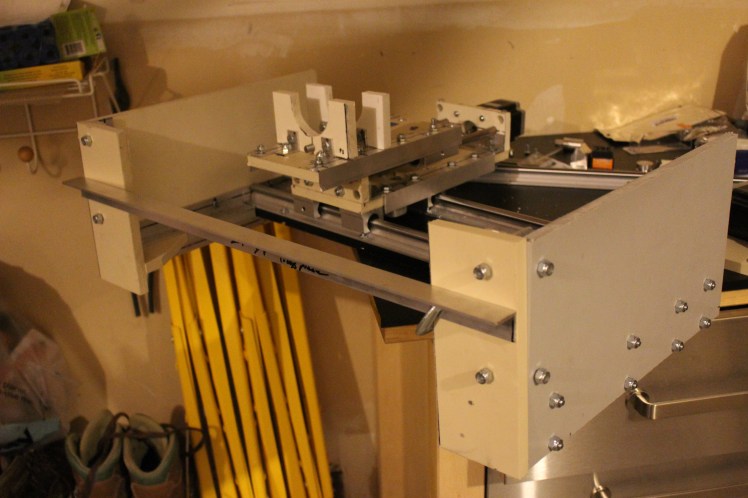
Aligning the X-axis rails, using the gantry:
Making clear acrylic drilling templates to ensure alignments:

Testing 3D printed nut assembly with feeler gauge: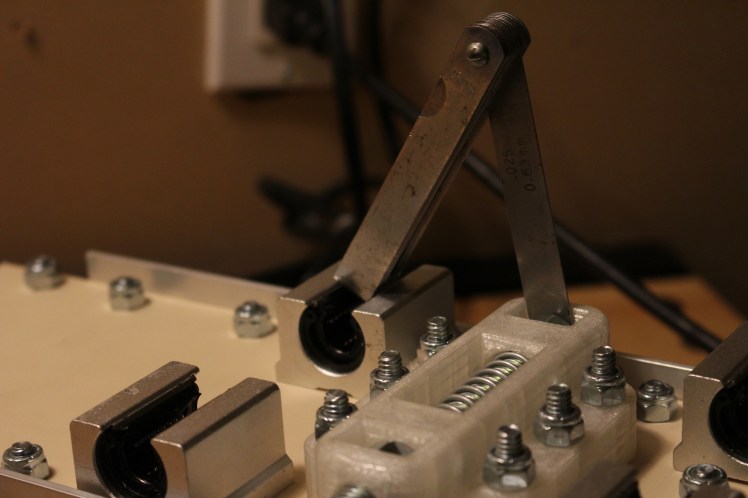
Gantry under construction: