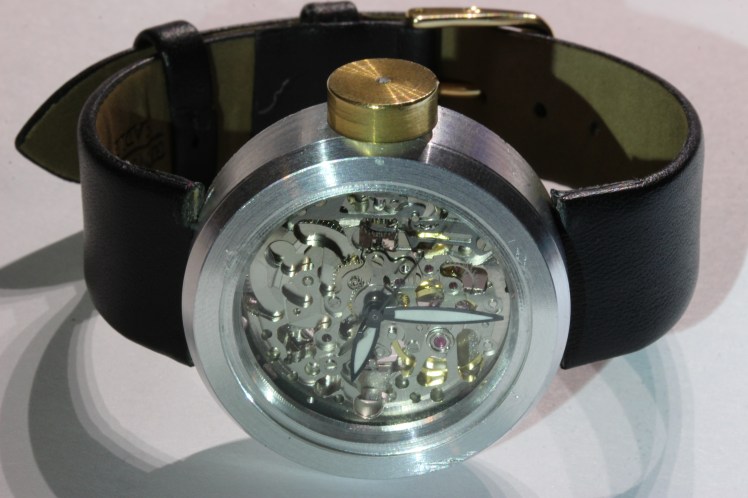
I wanted to learn how use my Taig lathe more accurately, so I designed and “turned” a watch case.
Here are some pictures of the finished product (more on the process below):


Process:
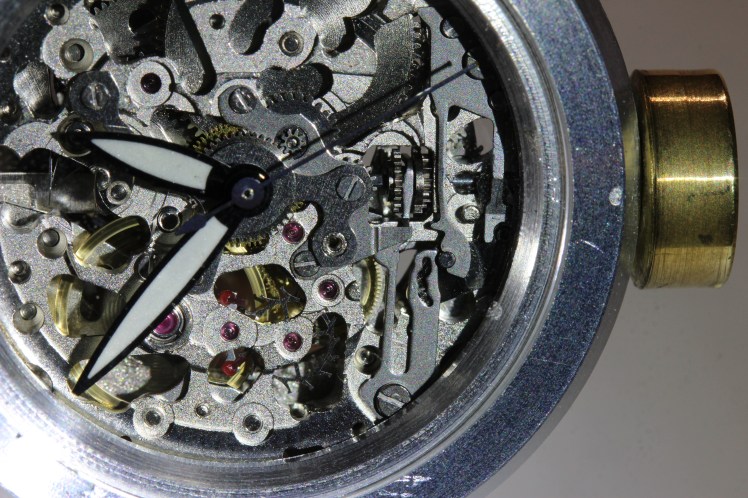
- Knowing that I wanted to use an automatic skeleton movement, I did some research and settled on the Miyota 8N24, due to its low cost ($44), excellent mechanical documentation, and recommendation from a friend.
- After drawing up the watch in CAD, I exported a set of actual size 2D drawings and cross sections. With such a small part, every dimension is critical, and I wanted to ensure that I was machining mindfully.
- Bought a rod of 2024 aluminum from the local scrap yard.
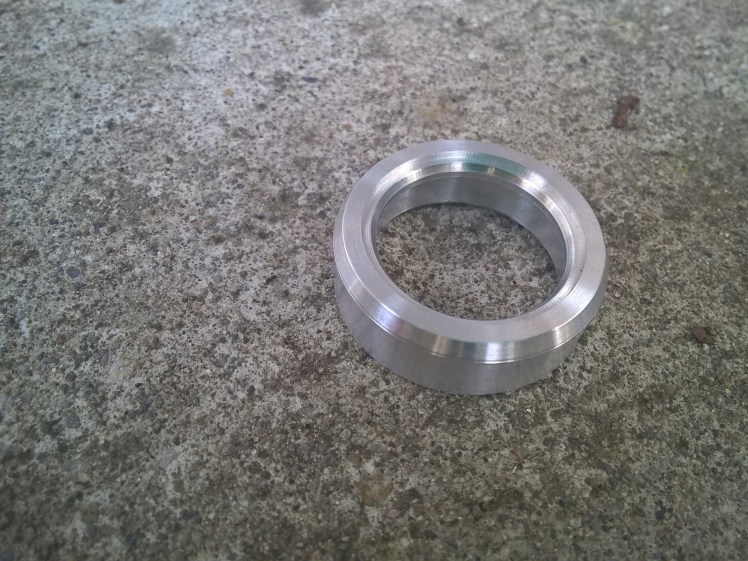
- After facing and squaring the edges, I drilled out the inside, and bored it to the correct diameter (26mm) to accept the movement, and added a recess for the rear crystal. I parted off this section.
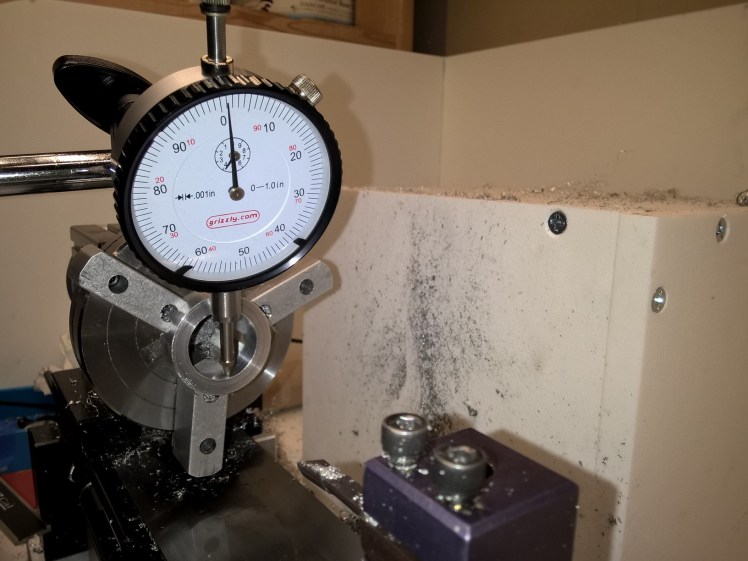
- With a 3-jaw chuck, getting stock centered is difficult. To accept the case in reverse-orientation, I machined my lathe’s soft jaws, and checked concentricity to 0.001”.
- I machined the top of the case, adding inner and outer chamfers, as well as a recess for the top crystal.
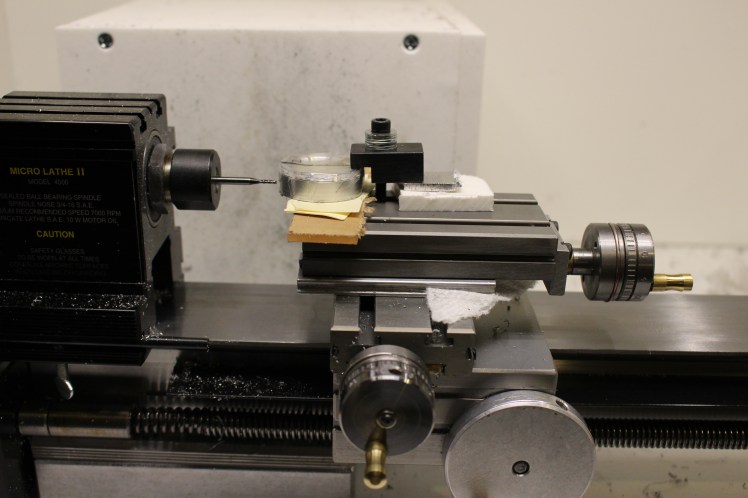
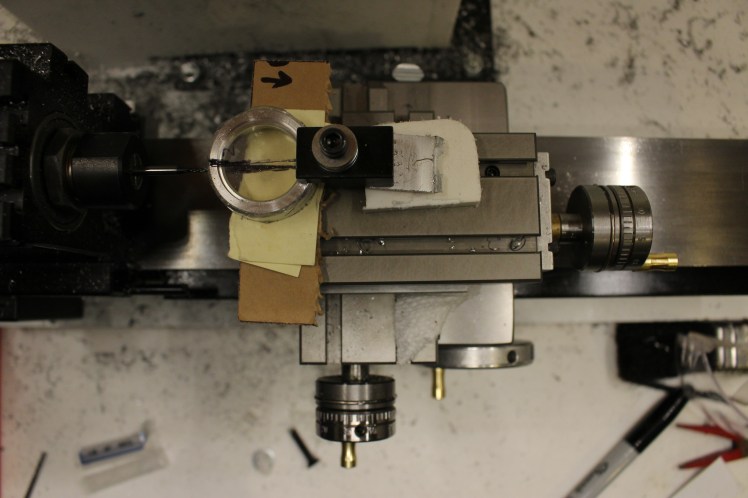
- Since I have no mill, it was difficult to figure out how to attach a band to the case. Traditional lugs would be impractical, so I decided to add blind slots under the case. I clamped the case onto my cross slide (“fake milling attachement”) and used shims (scrap plastic, metal, and paper) to set the height. After milling the slots, I used a burr to drill holes for the spring pins (half of them were drilled blind from the inside, using a calculated ratio with the cross slide).
- By heating the case to 700 degrees and cooling the crystal, I thermo-fit the top crystal into the case. This cracked due to thermos-shock the first time, so I tried again, successfully.
- Finally, I installed the hands, inserted the movement, machined a simple brass crown, and fastened the rear crystal.
Notes for future consideration:
- I decided to turn the case out of Aluminum instead of Stainless, because I was more confident in my abilities to machine it. Due to this, I always had to cover it with packing tape before clamping; even this was not entirely effective at preventing scratches.
- The watch runs slightly fast – It’s possible that I accidentally tweaked something in the assembly process.
Below are some pictures of the process:
Fake milling attachment:
Fake milling attachment, from above:
Drilling the spring pin holes: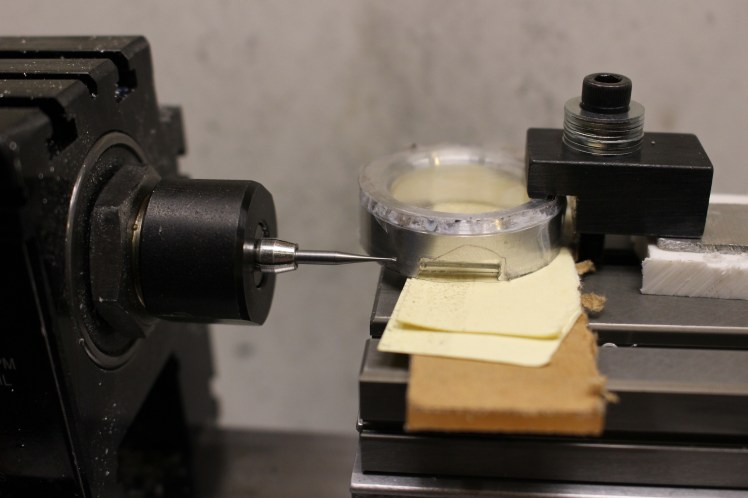
Drilling the spring pin holes, another angle: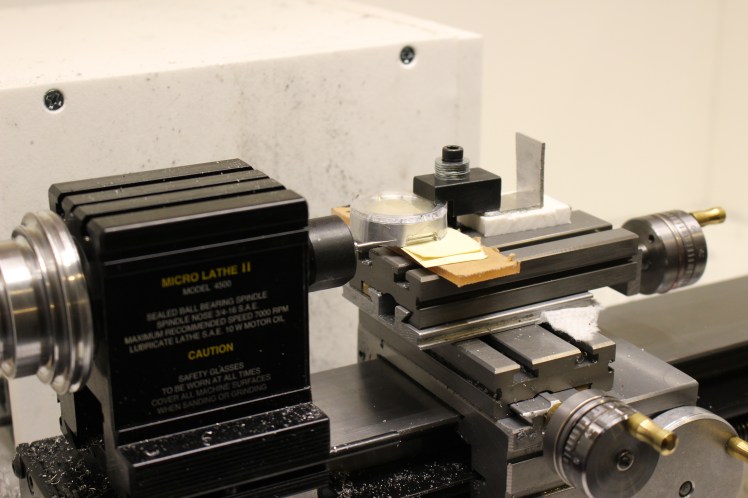
Measuring concentricity of the case in the chuck:
The case before slotting: